Nothing’s worse than hearing that dreaded scrape against a curb, only to look down and see your rim scratched up. But don’t worry- curb rash isn’t the end for your wheels! With a few simple tools and a little time, you can get those rims looking almost brand-new again.
In this guide, I’ll walk you through easy, affordable steps to fix those scratches yourself. Let’s roll up our sleeves and get those wheels back in top shape!
Table Of Content
What You’ll Need: Tools and Materials
Here’s a quick rundown of what to gather before you get started:
- Sandpaper (various grits): Starting with a coarser grit (like 220) and working up to a finer one (around 600-800) will help you remove scratches and smooth out the surface for a flawless finish.
- Rubbing Alcohol or Cleaner: Use this to clean the rim thoroughly before you begin sanding. Removing dirt, dust, and grease will allow your work to stick better.
- Filler Putty: For deeper scratches, filler putty helps even out the damaged areas so they blend with the rest of the rim.
- Painter’s Tape🧻: Use this to mask off the tyre and any undamaged parts of the rim, protecting them from sanding or accidental scratches.
- Primer and Rim Paint 🎨: For that polished, like-new finish, primer and paint will restore your rim’s original look and protect it from future damage.
- Microfiber Cloths: These are essential for wiping surfaces clean during each step and making sure your work area is dust-free.
Having these tools on hand will help ensure your repair goes smoothly and gives the rims a professional-looking finish. Let’s get those wheels shining!
Here’s a more detailed guide with specific tools, materials, and tips on fixing curb-scratched rims. With the right products and steps, even a first-timer can get impressive results.
Step-by-Step Guide: Fixing the Scratches
1. Clean the Rim Thoroughly
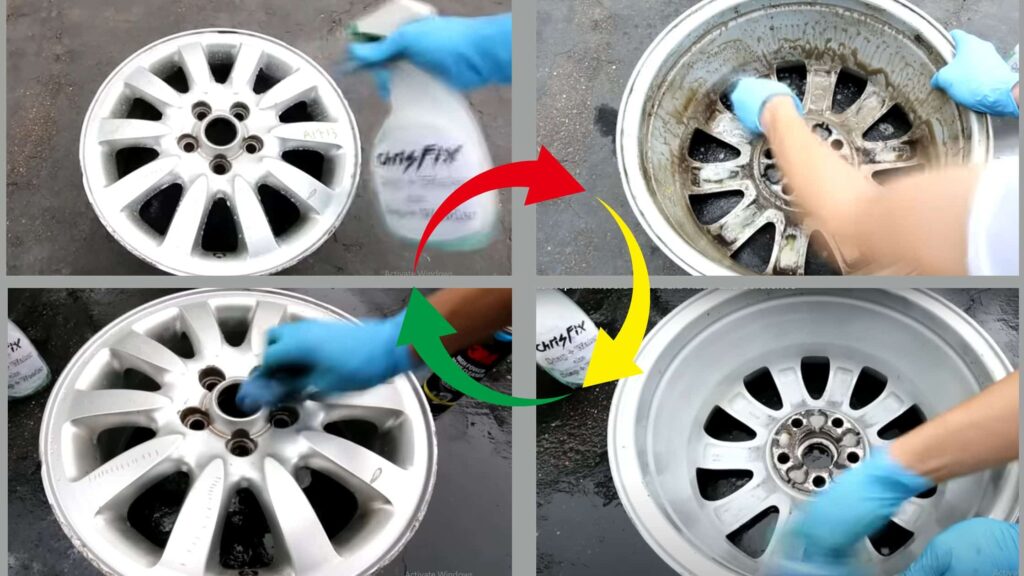
- Products: Dish soap, water, rubbing alcohol, microfiber cloth.
- Why: A clean surface is essential for an effective repair. Dirt or grease can cause uneven results and prevent fillers or paint from adhering properly.
- How: Wash the rim with a sponge or brush using soapy water. Rinse well, then wipe with rubbing alcohol on a microfiber cloth to ensure it’s completely clean and ready for sanding.
Do I need to remove the wheel from the car to fix it?
It’s not strictly necessary, but removing the wheel makes the repair process easier and safer.
2. Sand the Damaged Area
- Products: Sandpaper in coarse to fine grits (220, 400, 600, and 800).
- Why: Sanding removes the damaged layer and smooths out scratches, providing an even base for putty or paint.
- How: Start with 220-grit sandpaper to remove deeper scratches, using small, circular motions. Work up to finer grits like 400, 600, and finally 800 grit, which helps blend the area seamlessly with the undamaged rim surface. For best results, use wet/dry sandpaper and wet it slightly as you sand to prevent scratching.
3. Apply Filler Putty for Deeper Scratches
- Products: Automotive filler putty (e.g., Bondo Glazing & Spot Putty), plastic applicator.
- Why: Filler putty helps fill in deep scratches or gouges, restoring the smooth, even surface of the rim.
- How: Squeeze a small amount of putty onto a plastic applicator and spread it over the damaged area. Push the putty into the scratch and smooth it out to cover all rough spots.
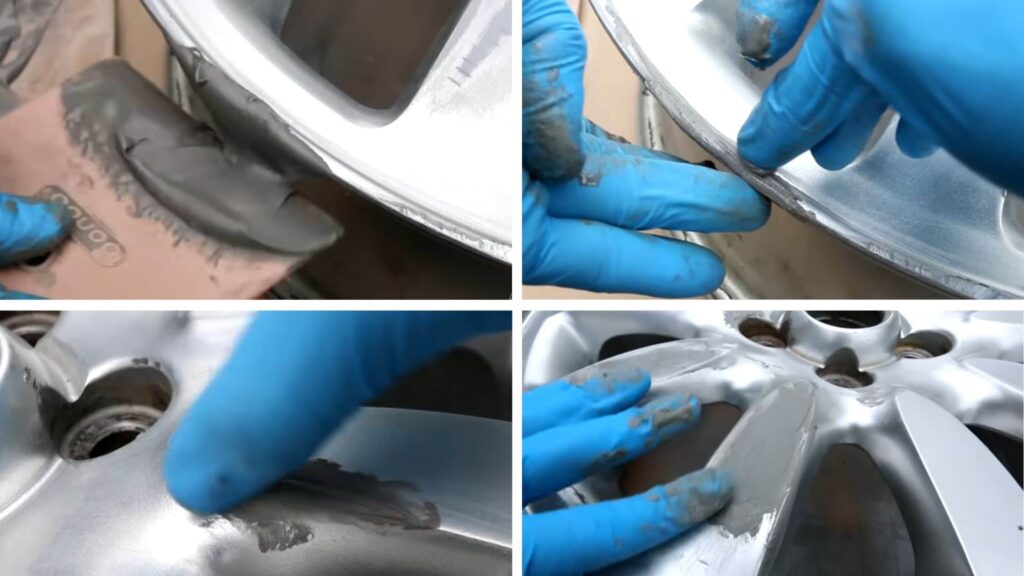
🔸Is filler putty necessary for all rim scratches?

No, filler putty is only needed for deeper scratches. Light scratches can usually be fixed with sanding and paint alone.
Let the putty dry according to the manufacturer’s instructions (usually 30–60 minutes), then sand the area again with 600-800 grit sandpaper for a flawless finish.
4. Mask Off Surrounding Areas
- Products: Painter’s tape (low-tack preferred) and plastic or paper to cover the tyre.
- Why: Masking protects areas you don’t want to sand, prime, or paint, keeping the rest of the rim and tyre clean.
- How: Carefully apply painter’s tape around the rim’s edge, covering any undamaged sections. Cover the tyre with plastic or paper, securing it with additional tape.
5. Prime and Paint the Area
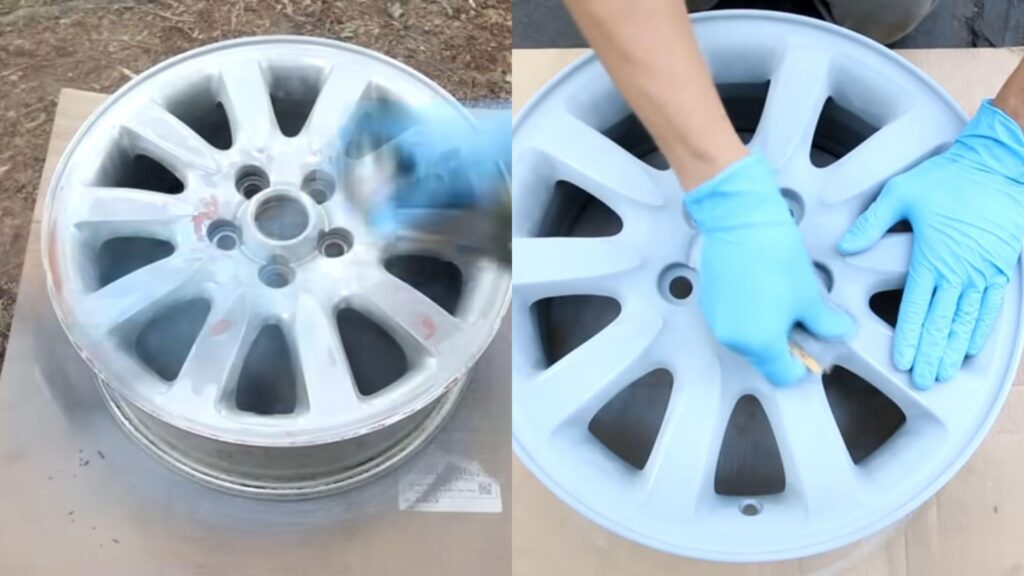
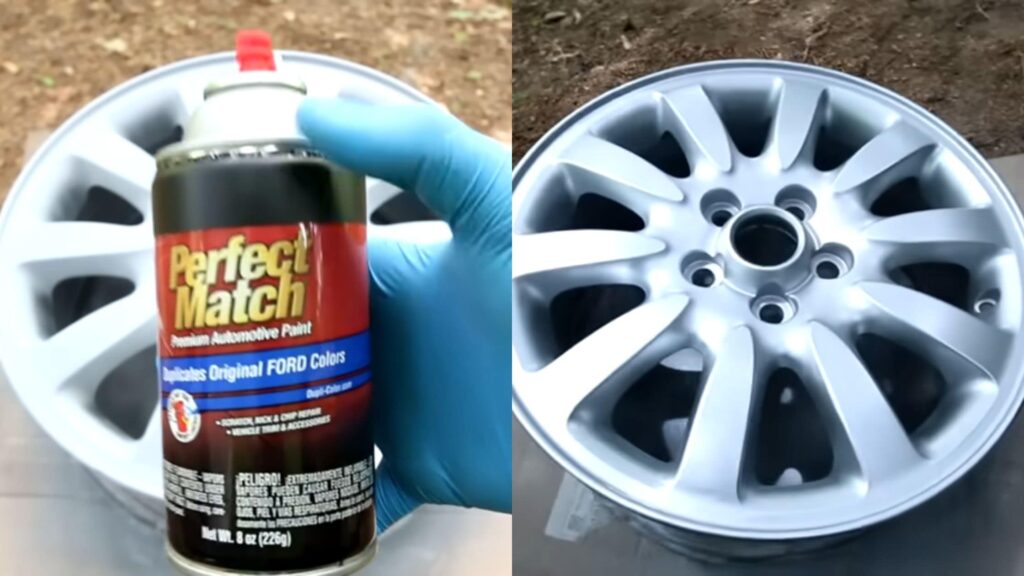
- Products: Automotive primer spray (e.g., Rust-Oleum Automotive Primer), colour-matching rim spray paint (check for exact match brands), soft-bristle brush (optional for touch-ups).
- Why: Primer and paint ensure durability and help the repair blend with the rest of the rim.
- How: Apply a light coat of primer over the sanded and filled area. Allow it to dry for about 15–30 minutes. Once dry, apply your rim paint. Hold the spray can 8–10 inches from the rim and apply in light, even coats to avoid drips. Allow each coat to dry for 10–15 minutes before applying the next. Plan for 2–3 coats for best results.
How do I know what colour to use on my rims?
Check the car manufacturer’s colour code for the rims, or find a close match with automotive rim-specific spray paint brands.
6. Finish with a Clear Coat
- Products: Automotive clear coat spray (e.g., Dupli-Color Clear Coat).
- Why: A clear coat adds a layer of protection and shine, making the repair more durable and resistant to future scratches.
- How: Spray a clear coat over the painted area using the same technique as the primer and paint- light, even coats with a drying time of about 10 -15 minutes between each. Two coats are usually sufficient for good finishing.
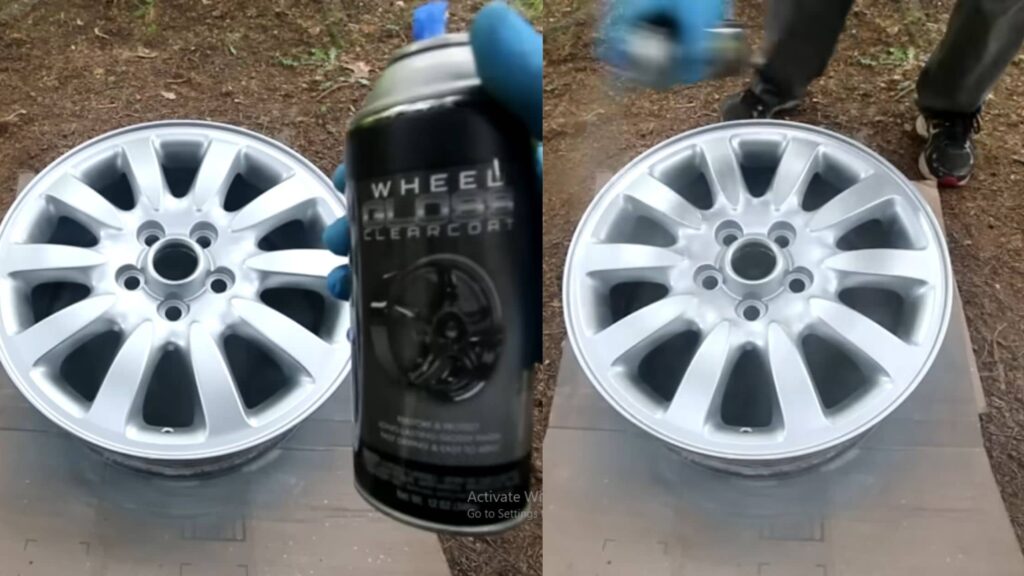
Is it okay to skip the clear coat?
It’s best not to skip it. A clear coat protects the paint and gives it a durable finish that resists future scratches.
7. Remove Tape and Inspect Your Work
- Products: Microfiber cloth.
- Why: Removing the tape carefully ensures no paint or residue is left on the tyre or undamaged rim areas.
- How: Once the clear coat is fully dry, carefully peel away the tape and plastic cover. Wipe the rim gently with a microfiber cloth to remove any dust. Inspect the repair to ensure it blends seamlessly with the rest of the rim.
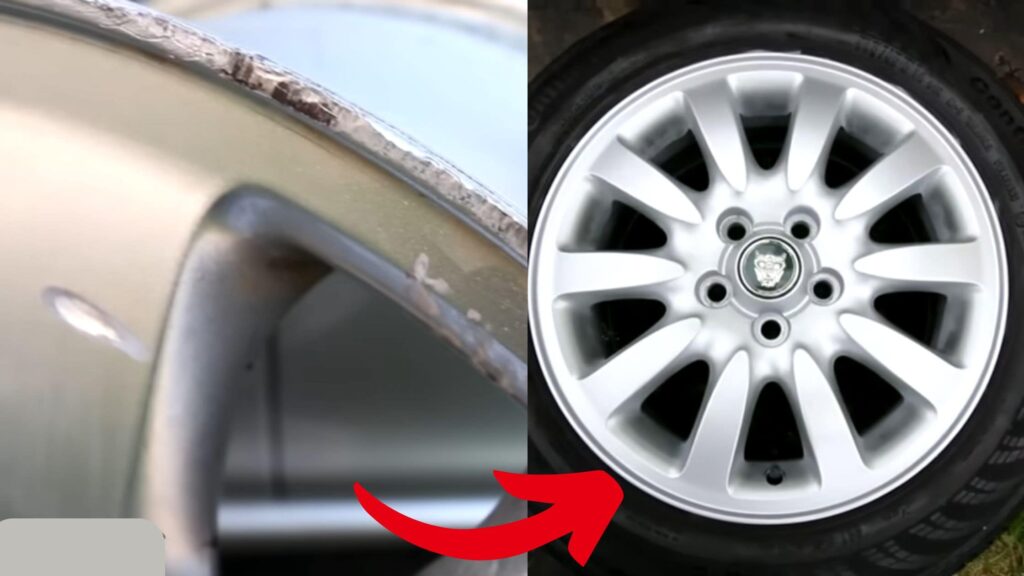
By using these materials and following these steps, you’ll have a professional-quality repair at a fraction of the cost. Now, those once-scratched rims will look nearly brand new, ready to roll with pride!
Will my rim repair be durable enough to last?
Yes, with proper primer, paint, and a clear coat, a DIY repair can last for years under regular driving conditions.
Will the repaired area look exactly like the rest of the rim?
Proper sanding, priming, and painting can yield a near-perfect finish, though slight texture or colour differences may still be visible up close.
How do I avoid future curb scratches on my rims?
Preventing future curb scratches starts with some smart habits and a few affordable accessories. Here’s how:
- Watch Your Distance– When parallel parking, aim to leave a safe gap from the curb. Use your side mirrors and reverse slowly to stay aware of how close you are to the curb.
- Curb Feelers– Consider adding curb feelers, which are small metal rods that alert you when you’re close to a curb. These are inexpensive and can be attached to the wheel wells.
- Rim Protectors – Rim protectors or alloy wheel protectors add a buffer zone between the wheel and the curb. They come in various colours, snap onto your rims, and can save your rims from small bumps or scrapes.
- Parking Tips – Practice angling your wheels when parking near curbs and avoid tight spots where space is limited. Remember, a little caution goes a long way.
- Be Mindful in Tight Spaces – When navigating narrow lanes or drive-thrus, keep an eye on your wheels and approach cautiously. The more you practice, the easier it becomes to avoid accidental scrapes.
Frequently Asked Questions:
1) What’s the best type of sandpaper for rim repairs?
Start with a coarse grit like 220 for initial sanding, then move to finer grits (400, 600, 800) for a smoother finish.
2) Can scratched rims be fixed at home, or should I go to a professional?
Minor scratches can be repaired at home with the right tools and patience. However, deep gouges or extensive damage might be better handled by a professional.
3) How long does it take to repair a scratched rim?
A DIY repair typically takes 1–2 hours, including drying times for filler putty, primer, and paint.
4) Can I use any automotive primer, or should it be rim-specific?
General automotive primer works fine. Just ensure it’s compatible with metal surfaces and has good adhesion.
5) Will the colour match perfectly after painting the rim?
Using colour-matched spray paint can help, but an exact match may vary based on the brand and rim finish.
6) Can scratched rims affect my car’s resale value?
Yes, damaged rims can reduce a car’s appeal and value, so repairing them can be a worthwhile investment.
7) Is it necessary to use a mask and gloves during the repair?
Yes, safety gear like masks and gloves are recommended to protect against dust from sanding and fumes from spray paint and clear coat.
8) How do I protect my tyres while spray painting the rims?
Use masking tape and newspaper or plastic sheeting to cover the tyres, or apply a dedicated tyre cover to keep the paint off.
9) What’s the best way to clean the rim before starting the repair?
Use a degreaser or rubbing alcohol to clean the surface. Removing any dirt, grease, or brake dust will help the repair materials adhere better.
Conclusion:
Wrapping up, and fixing curb scratches on your rims doesn’t have to be a hassle. With a few tools, the right materials, and a bit of patience, you can restore your rims to near-new condition.
Taking care of the details- like using the right grit of sandpaper and choosing quality filler and paint- will make all the difference in the final result.
Plus, handling repairs yourself saves money and gives a sense of satisfaction every time you see those gleaming wheels.
Next time you notice a scratch, you’ll be ready to tackle it head-on and keep your ride looking its best!

